Here's all you need:
 Lukewarm water, honey or sugar, yeast, all-purpose flour and a stand mixer (with a dough hook) or a stout food processor (with a plastic dough blade). Or you could, I suppose, mix it all up in, like, a bowl and knead it on the counter. Like they did in olden days.
While I've always pined for one of those crinkle-black, mac-daddy industrial-strength (600w) KitchenAid stand mixers, I find the white, uptight and outtasite KitchenAid food processor to be a bit more versatile. And way easier to rationalize than a machine I'd lay out three bills for, just to make pizza dough. Pennies a serving or not.
It also helps if you have a baker's peel (one of those flat wooden dealies with a handle; sorta looks like a big scary paddle--and works as one in a pinch, or so I hear.) It's it's not a deal-breaker if you don't. You just need something to get the thing in and out of the oven. A good sized cutting board served us for years before it finally broke and we broke down and got the peel. A baking stone is also a worthwhile investment. (Remember, pennies a serving!) If you're an exceedingly cheap bastard, as I once was, you can slide four 8"x 8" unglazed terra cotta tiles (~$1 apiece at Home Despot) together on your center oven rack. It gets to be kind of a pain after a while, scraping them clean and keeping them together. And they chip easily. YMMV.
So, here's what you do.
Put about 1 1/2 cups of lukewarm (~85 degrees F.) water in a big-ass measuring cup or mixing bowl. Stir in about 1 tablespoon of honey or sugar. (I like honey because it dissolves more easily and seems less processed--but that's just kooky, semi-crunchy me.) Then stir in two packets of yeast and let it sit until the yeast starts to foam up a bit, which usually takes about 10 minutes.
 While the yeast is getting its sugar buzz on, combine the dry ingredients--4 cups of flour, and a tablespoon of salt--in the bowl of the mixer or food processor. Since we have a few minutes before the yeast solution is ready, here's a thought about flour: The higher the protien and gluten content, the better the dough and crust will be. I think that's right. If you're an accomplished (notice I didn't say 'master') baker, please feel free to square me away. In my experience, organic (natch) unbleached all-purpose white or bread flour seems to work best.
If you want more whole-wheat flavor, just substitute no more than one cup of whole-wheat flour for the all-purpose. Half a cup seems to be ideal. You might be tempted to use more, but you must resist this urge. Unless you like hard, chewy, non-elastic dough that, when baked, resembles pickup truck bedliner in texture and appearance. Ask me how I know.
I've also read recipes that recommend using 1 cup of cake or pastry flour. I've tried it a couple times with less-than-ideal results. I might try it again though. 'Cause, you know, what have I got to lose?
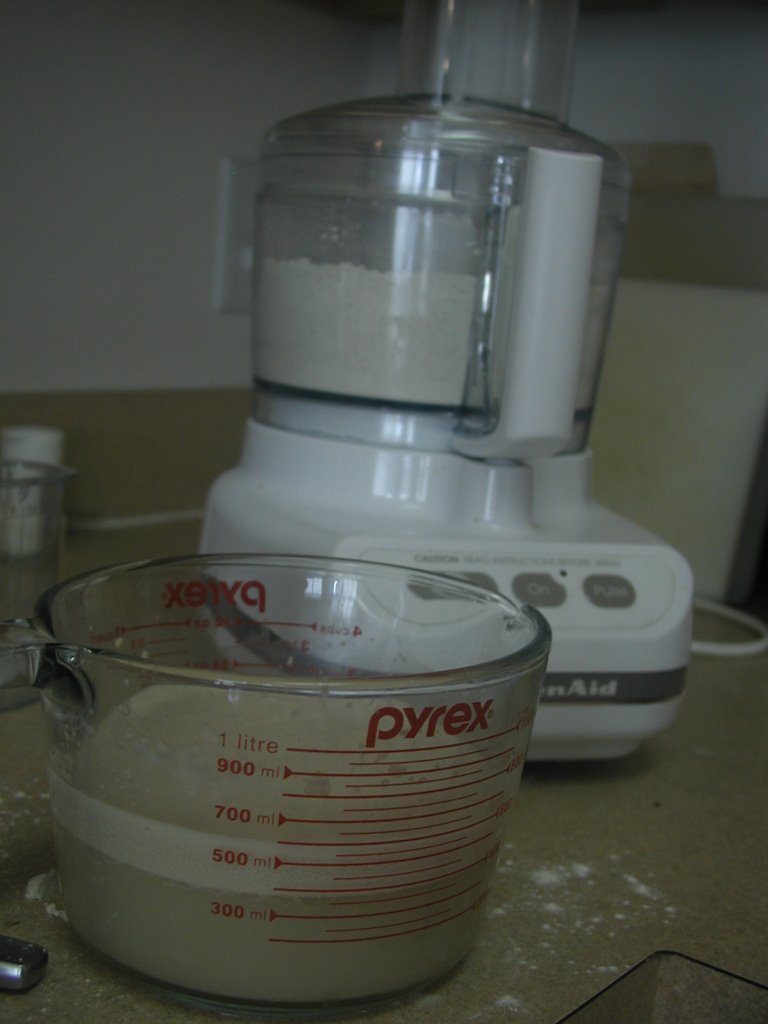
 Okay, now fire up your mixing machine and slowly drizzle the yeast/water mixture into the flour. It should start setting up and begin to form a large, slightly sticky wad of dough. If you're one of those lucky bastards with a stand mixer, it'll probably form the dough into a lovely ball for you. The rest of us have to pull the wad out of the FP and form first into a ball, then a cylinder, which we divide in half and form into two smaller balls.
One thing I've found is that the longer you mix the dough, the more elastic it turns out. So, once the flour is thoroughly mixed with the water, let it go for another 30-60 seconds. And you know what? If it all goes pear-shaped, non c'e male--we're talking pennies a serving here, raggazzi.
Drizzle about a teaspoon of olive oil into a smallish mixing bowl/largeish soup bowl. Roll each dough ball around in the oil to lightly coat. Then cover the bowls with a damp paper towel or plastic wrap.
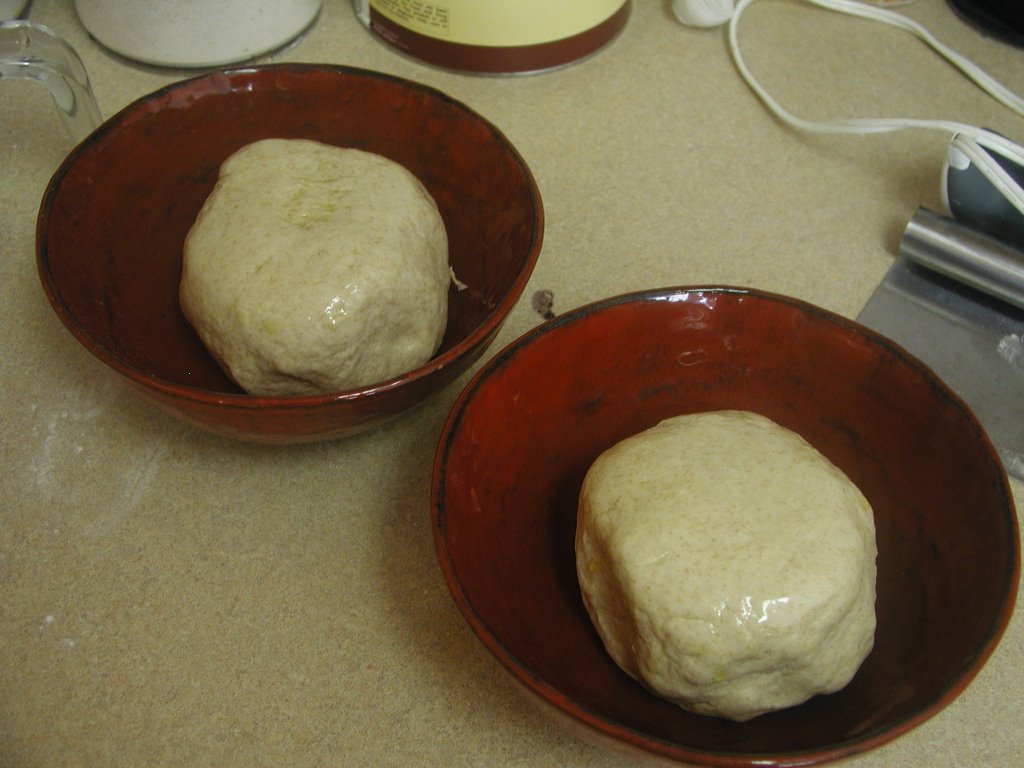
Wait a few hours.

Once the dough has risen and you're ready to roll it out, sprinkle a liberal sprinkling of flour on the work surface. (A countertop for poor schmucks like you and me; a butcherblock island top for you lucky bastards with your trophy kitchens.)

Also, now is the time to start pre-heating your oven. You want it as hot as it'll go, which on most home units is 550 degrees, F.
 I actually prefer to roll mine out just a little, then finish it off by hand. (There's got to be a way to say that that doesn't sound like something you'd hear in a rest-area men's room).
The idea is basically that you want to stretch (rather than flatten) the dough unil it's the size and shape you want. And by stretching it, you get a little ridge of crust around the outside edge, which is nice.
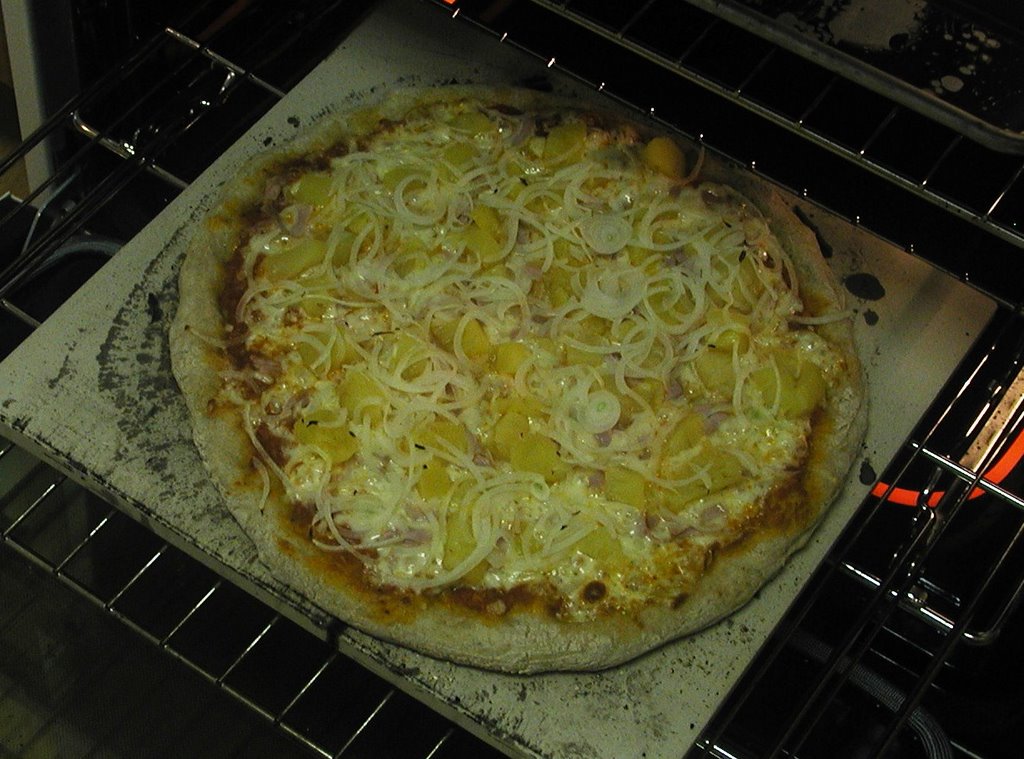
Once you've shaped the dough into a relatively round crust, sprinkle some corn meal on your peel and transfer the crust to it. Give the peel a little shimmy-shake to make sure that the corn meal is keeping it from sticking. Repeat the shimmy test periodically while you're applying toppings. If it starts to stick, try lifting the edge of the dough and tossing a few more grains underneath.
Now you're ready for sauce and toppings.
Sauce can go one of two ways--red (the traditional tomato sauce) or white (garlic and olive oil with maybe some chili flake and/or dried herbs. Me, I've been opting more for the white lately, not least because it's easier and faster, and also because it doesn't soak into the dough like the tomato sauce.
I like part-skim mozzarella as the main cheese, which can be niceley alloyed with lots of other cheeses--pepper jack, provelone, etc., and occasionally punctuated with bits of goat cheese, crumbles of feta or gorgonzola (a little of which goes a long way, AMHIK), or dusted with Parmiggiano or Pecorino Romano.
As for toppings, there are three themes I come back to: Hawaiian (ham, pineapple, and onion), Amatriciana (pancetta [Italian bacon], fresh tomato, and onion), and SMORRP (sausage, mushroom, onion, roasted red pepper). Regular readers will no doubt be shocked to see that each of these features some form of the magical animal. Although sometimes I substitute lamb sausage on the last one.
Once it's topped, slide it off the peel and onto the baking stone. It should be ready in 8-10 minutes, or whenever the crust starts to turn golden-brown.
 Pull it directly onto a good sized cutting board. If you like, brush a little olive oil around the edge.
Slice and serve with copious amounts of your favorite dago red.
Between bites, practice saying the following:
Ieri, non portrei ortografare "pizzaiolo"; oggi, lo sono!*
Buon appetito, amici!
*Yesterday, I couldn't spell "pizza-maker"; today I are one!